This is a really fun and rewarding Happy Birthday on a Budget project, but it
takes a little more patience and energy than my previous Happy Birthday on a
Budget handmade ideas. Here's the 20,000' flyover. Take your time
on this. Don't try to accomplish
everything in one day.
Gather the following items:
·
1 cereal bowl (Dollar Store)
·
piece of florist foam (Dollar Store)
·
cookie dough (find sugar cookie recipe in
previous post)
·
sugar cookie icing (find sugar cookie icing
recipe in previous post)
·
5 plastic
disposable decorating bags (Michaels, Hobby Lobby)
· 5 decorating couplers (Michaels, Hobby Lobby)
·
3 decorating tips in size #1, #2 & #3 (Michaels,
Hobby Lobby)
·
4 decorating colors of your choice (plus
original icing of white makes five colors) (Michaels, Hobby Lobby)
·
1 empty can Pringles chips
·
4-6 cookie cutters (these can be B-day cutters
or simple circles or squares or a combination)
·
2 small art brushes (for correcting icing) put
in a water glass with water
·
small spray bottle (for correcting icing)
·
wet washcloth (your hands and spills)
·
barbeque skewers
First Step: Make cookie
dough; make icing; decide on color scheme; which cookies will be which colors;
hot glue florist foam into plastic cereal bowl.
1. Bake cookies. After removing
cookies from the oven, set them onto a cooling rack with a spatula. One cookie at a time, gently place cookie on a
hard surface and insert skewer; place skewered cookie
back onto the cooling rack to cool (as it cools the skewer will embed tightly
into the cookie).
2. Divide and color icing (place
icing in separate bowls or plastic containers) and add drop of desired color, mix and set aside.

3. Begin basic icing (first layer) of
cookies. One by one, place coupler in
each of five decorating bags; place #3 tip on bag and add
icing to bag using empty Pringles can to hold bag. Ice cookies. With wet art brush, touch up any
icing
smears or icing boo-boos.
4. When first icing layer is
complete, leave cookies on waxed paper uncovered for some hours or overnight until completely dry; cover with waxed
paper. Keep icing refrigerated until cookies are dry.

5. Retrieve
refrigerated, filled decorator bags, let warm to room temperature. Attach tip #2 on bags, start second
icing layer: add lines, dots, etc. Once this layer is dry, attach tip #1 and write "Happy Birthday" on designated HB cookie (third layer).
6. Final Step: Assemble cookies in cereal bowl. Take clipper and cut skewers to desired heights. Insert cookies into florist foam inside bowl. Fill in gaps with shredded paper or tissue paper.
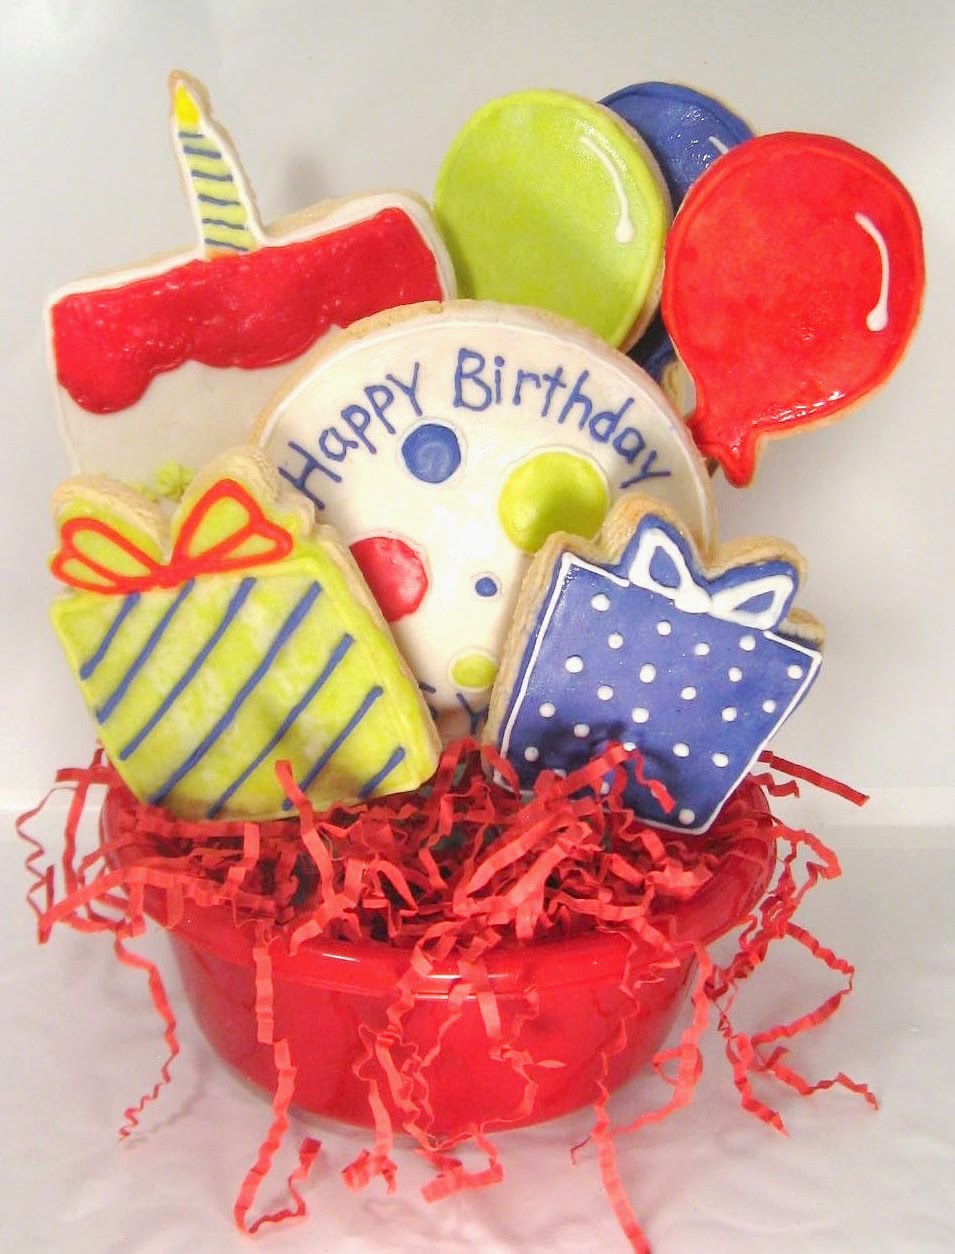
Total price of this Happy Birthday on a Budget cookie bouquet is under $10.00. Take your time; your Happy Birthday cookie bouquet will be beautiful and delicious as well.
However, if you
like the idea but don't have the time or patience to create a cookie bouquet, here are some places where you can purchase some amazing cookie bouquets starting at about $29.99 plus shipping.
No comments:
Post a Comment